HTML Editor extensions for MovableType
Helping you to build MovableType sites in your HTML editor faster and more efficiently!
Download
Mailing List
Using It
How it works
Credits
 To
make it easier to edit MovableType sites in TextPad, I have produced a
Clip Library. This allows you to drag and drop Movable Type tags (and
if appropriate, their corresponding closing tag) into your code. Any time
a tag has options I have included all of them. If you don't need to specify
an option, you can just delete it.
Installation instructions
Save the Clip Library into your TextPad clip library folder. If you don't
know where TextPad stores it's Clip Libraries, you can find it easily
by bringing up the Preferences window, found under the "Configure"
menu item. In the Preferences window, click on "Folder", and
you will be shown the filesystem locations of various support files, including
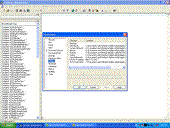
clip libraries. The screenshot at right shows the Preferences window opened
up in TextPad.
Unzip the folder and save it in the Clip Library directory.
Now, next time you start TextPad, it should recognize the Clip Library.
The one for Movable Type is called "MovableType Tags", and is
available in the pulldown. If you need more information about how to use
it with your MovableType website, see the directions below.
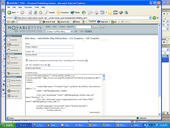
- Step 1: Link your templates
-
 You
first want to link your templates to actual files. That way you can
get to them from TextPad. Go into MT's admin area and tie each template
to a file. For each template that you want to edit in Dreamweaver,
fill in a filename in the space labeled, "Link this template to a
file". Now, rebuild your site to create filesystem versions of all
your linked templates.
You
first want to link your templates to actual files. That way you can
get to them from TextPad. Go into MT's admin area and tie each template
to a file. For each template that you want to edit in Dreamweaver,
fill in a filename in the space labeled, "Link this template to a
file". Now, rebuild your site to create filesystem versions of all
your linked templates.Example: if one of my templates is "index.html", I tie it to a file called "index.tpl.html". I never edit the actual "index.html", because that will be overwritten the minute I rebuild the site.
- Step 2: Configure your FTP program to transfer files to/from your MovableType website
-
Now you're ready to start editing. Startup your favorite FTP client and configure it to upload and download to/from your MovableType website. When you've connected and hit refresh you'll see the linked versions of the templates. Remember, only edit the source files. In my example, that's the ones with the .tpl.html on the end. If you edit the files that MovableType creates (such as index.html), you'll lose your changes in Step 3.
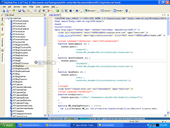
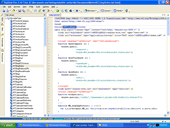
When you want to include a MovableType tag in your code, simply double-click it on the Clip Library window, as shown in the screenshots below.
- Step 3: Rebuild your site
- Since TextPad doesn't have an integrated FTP client, you have to FTP your templates back up to your MovableType website manually. Open up your FTP client and upload them to your site. Don't forget to upload your source files over the source files on the website. Note that if you changed your template through the MovableType backend while you had a local copy being edited in TextPad, your TextPad changes will overwrite the ones done through the MovableType backend.
- Step 4: Rebuild your site
-
Now that you've made your edits, login to your MovableType backend and hit the Rebuild option. This will rebuild your site from the templates. You should see the fruits of your labor!


